Author: Huang Publish Time: 27-01-2026 Origin: Site


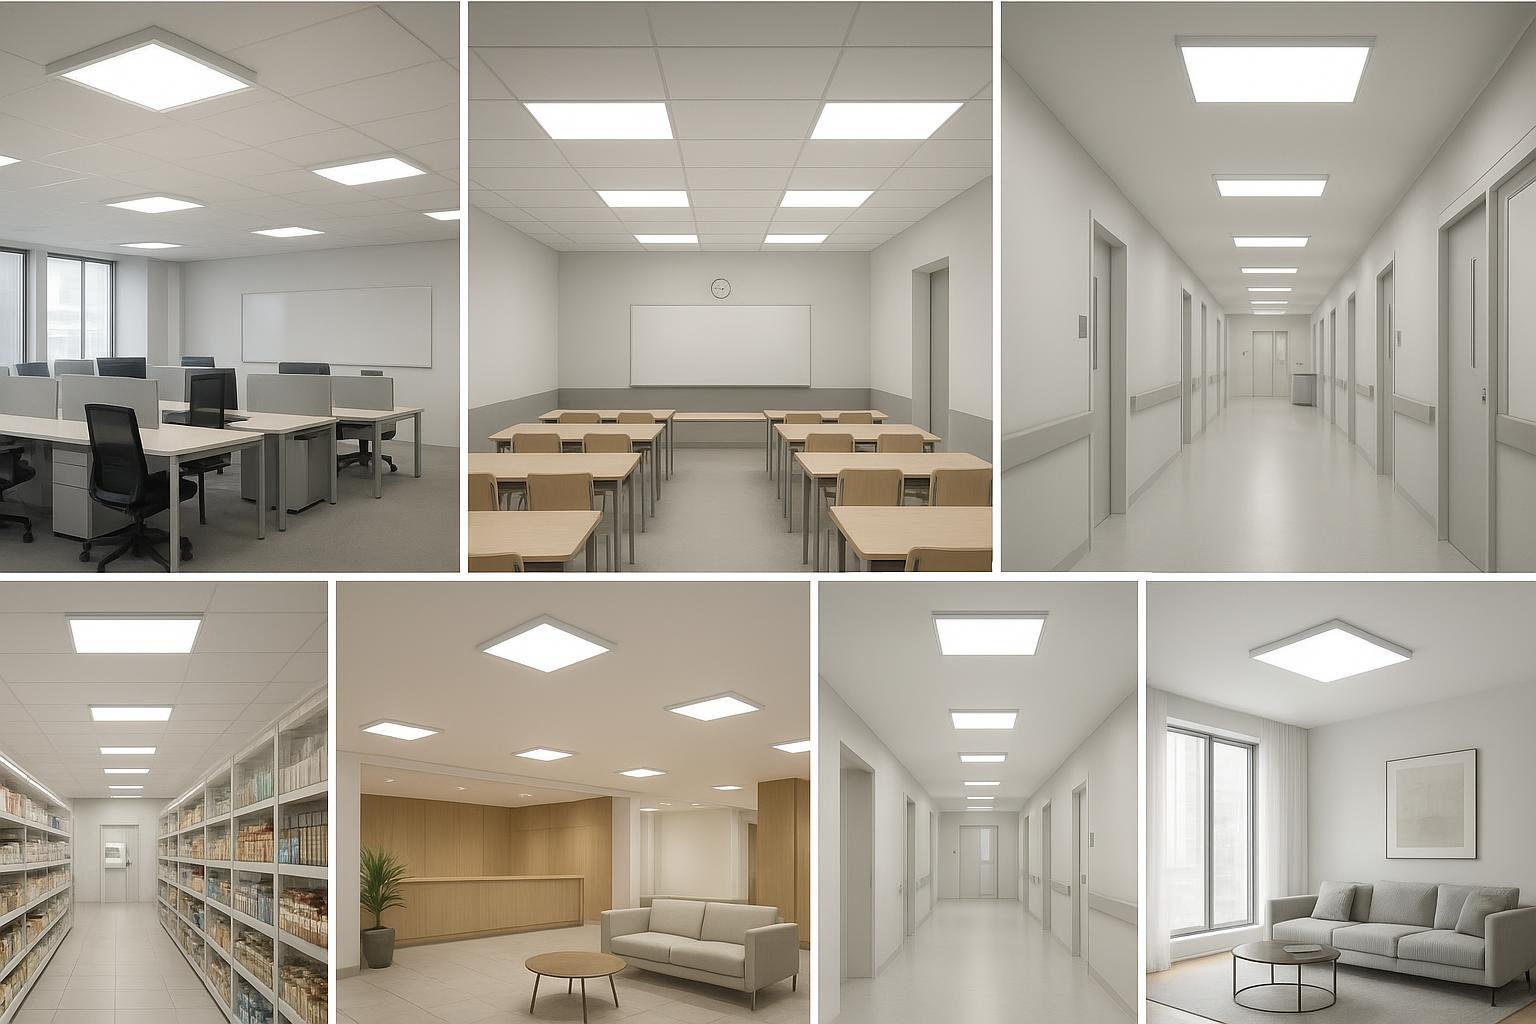
LED panel lights are everywhere—from open offices and classrooms to clinics, shops, hotels, warehouses, and living rooms. This guide shows retailers and distributors how to match the right panel to each environment, with a practical workflow grounded in standards, low‑flicker drivers, trustworthy certifications, and proven materials and thermal design.
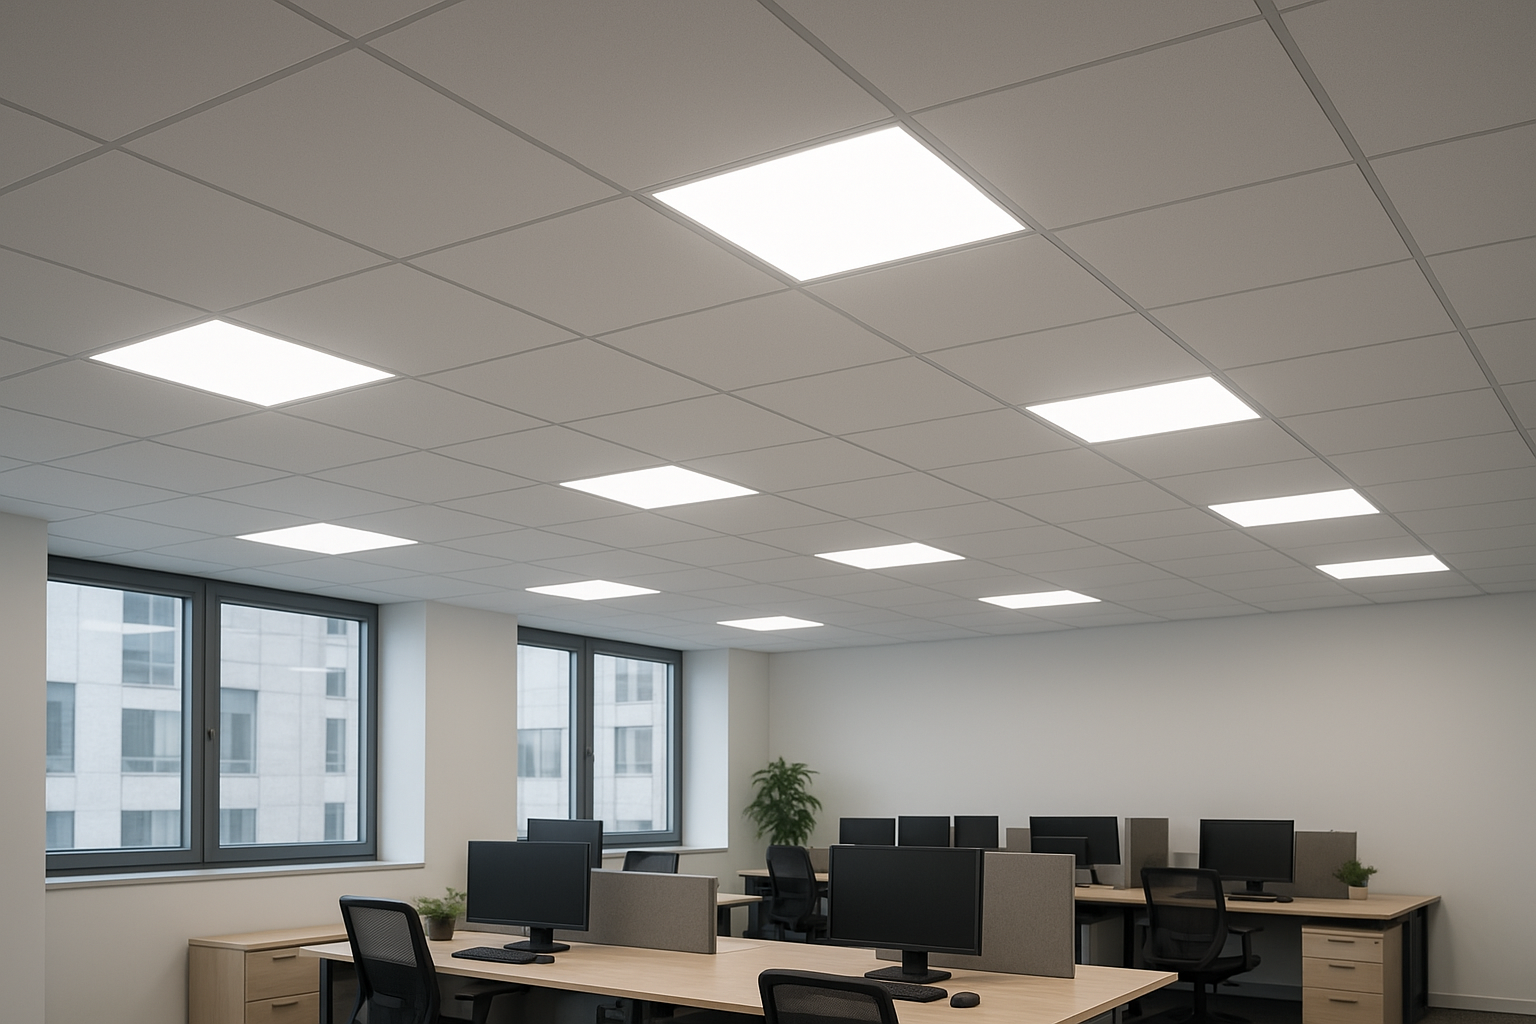
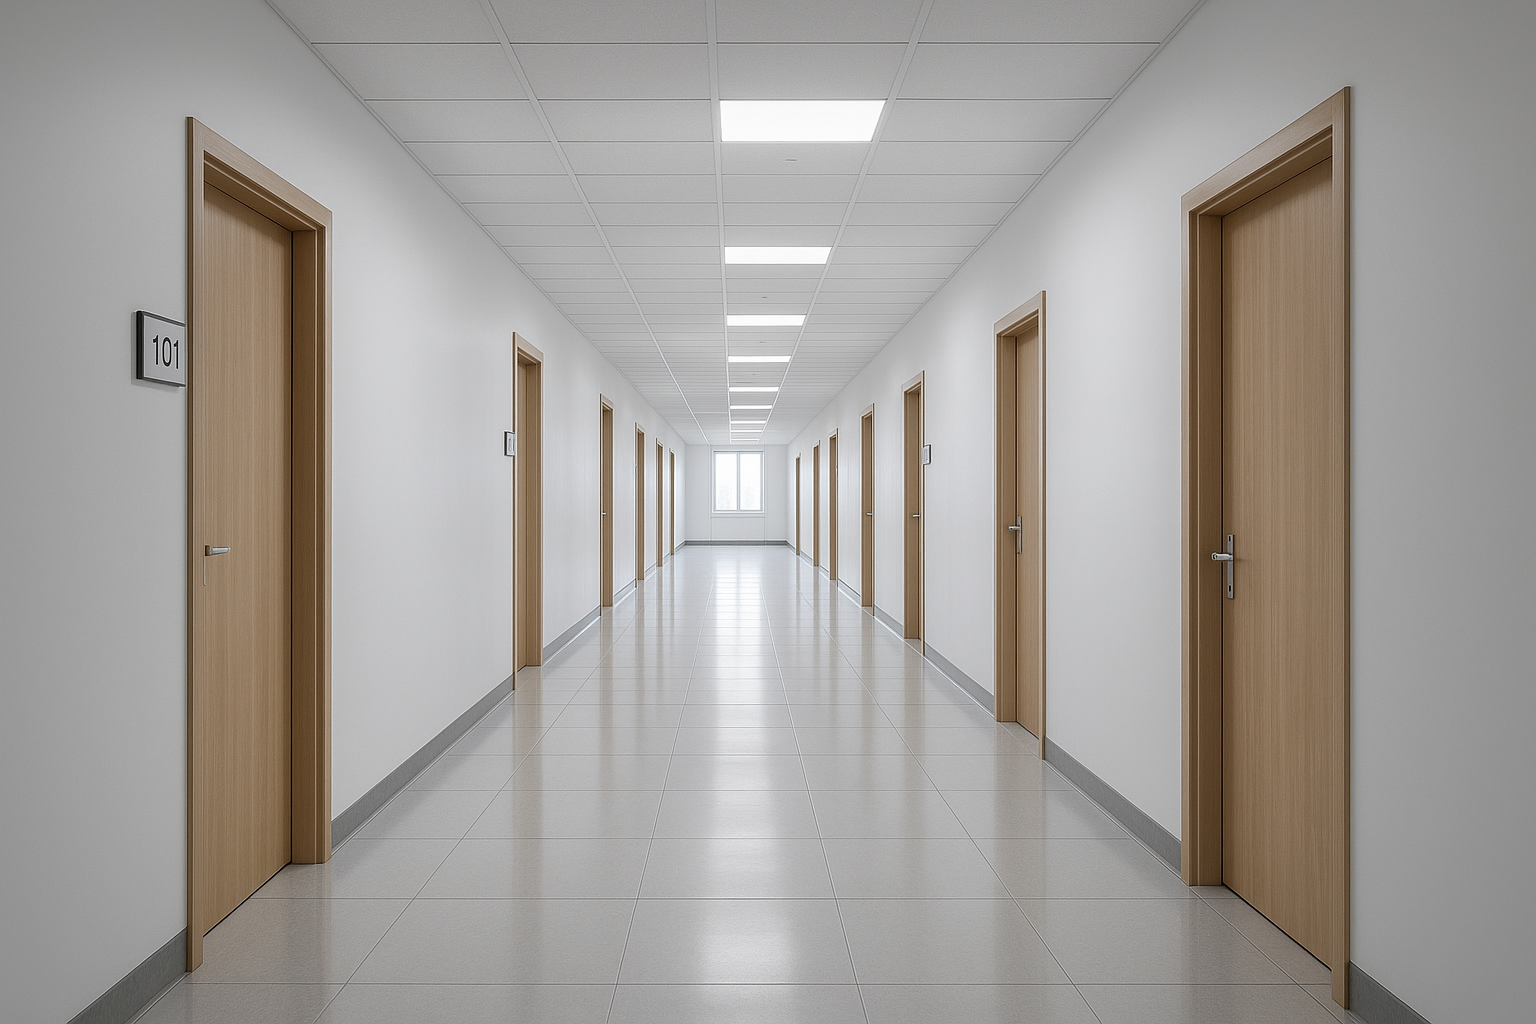
LED panel lights provide uniform, low‑profile general lighting with familiar ceiling module sizes, simple installation, and wide compatibility with modern controls. For distributors, the appeal is predictable performance, broad applicability across verticals, and SKUs that map cleanly to grid ceilings or surface/suspended kits. For specifiers and contractors, panel luminaires can deliver task‑appropriate illuminance and comfortable visual conditions when paired with the right optics and drivers.
Common strengths include:
Thin form factor and clean lines suitable for modern interiors
Uniform diffusion that reduces patchiness and shadows
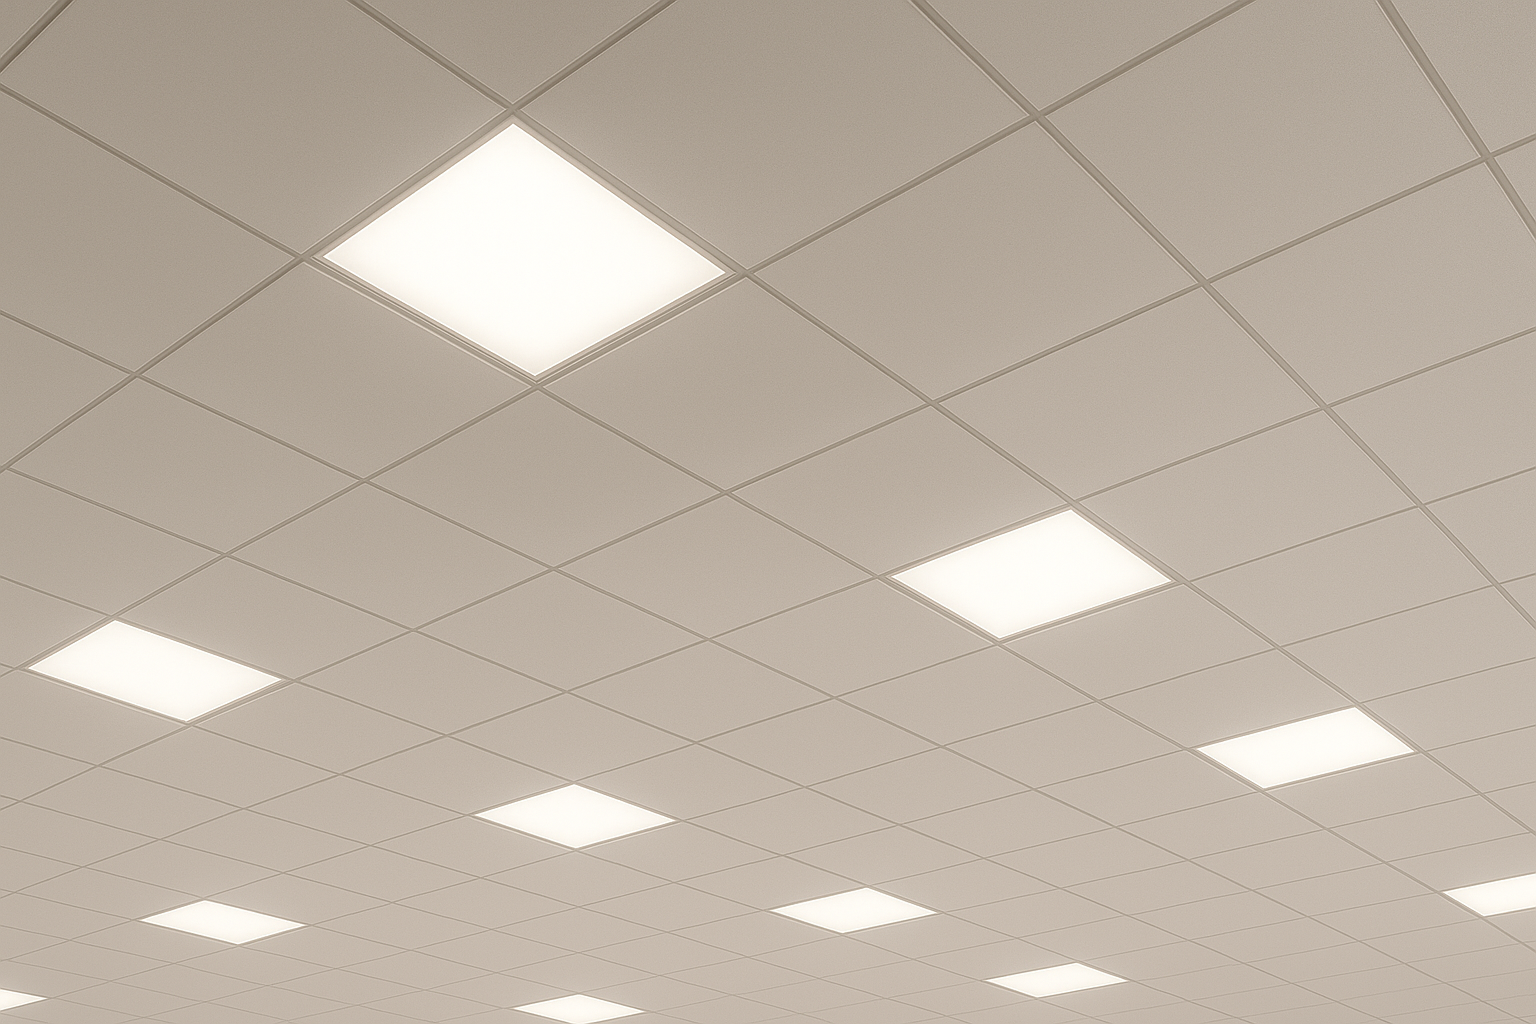
Broad size coverage (e.g., 600×600 mm, 2×2 ft, 1×4 ft, 2×4 ft) with mounting flexibility
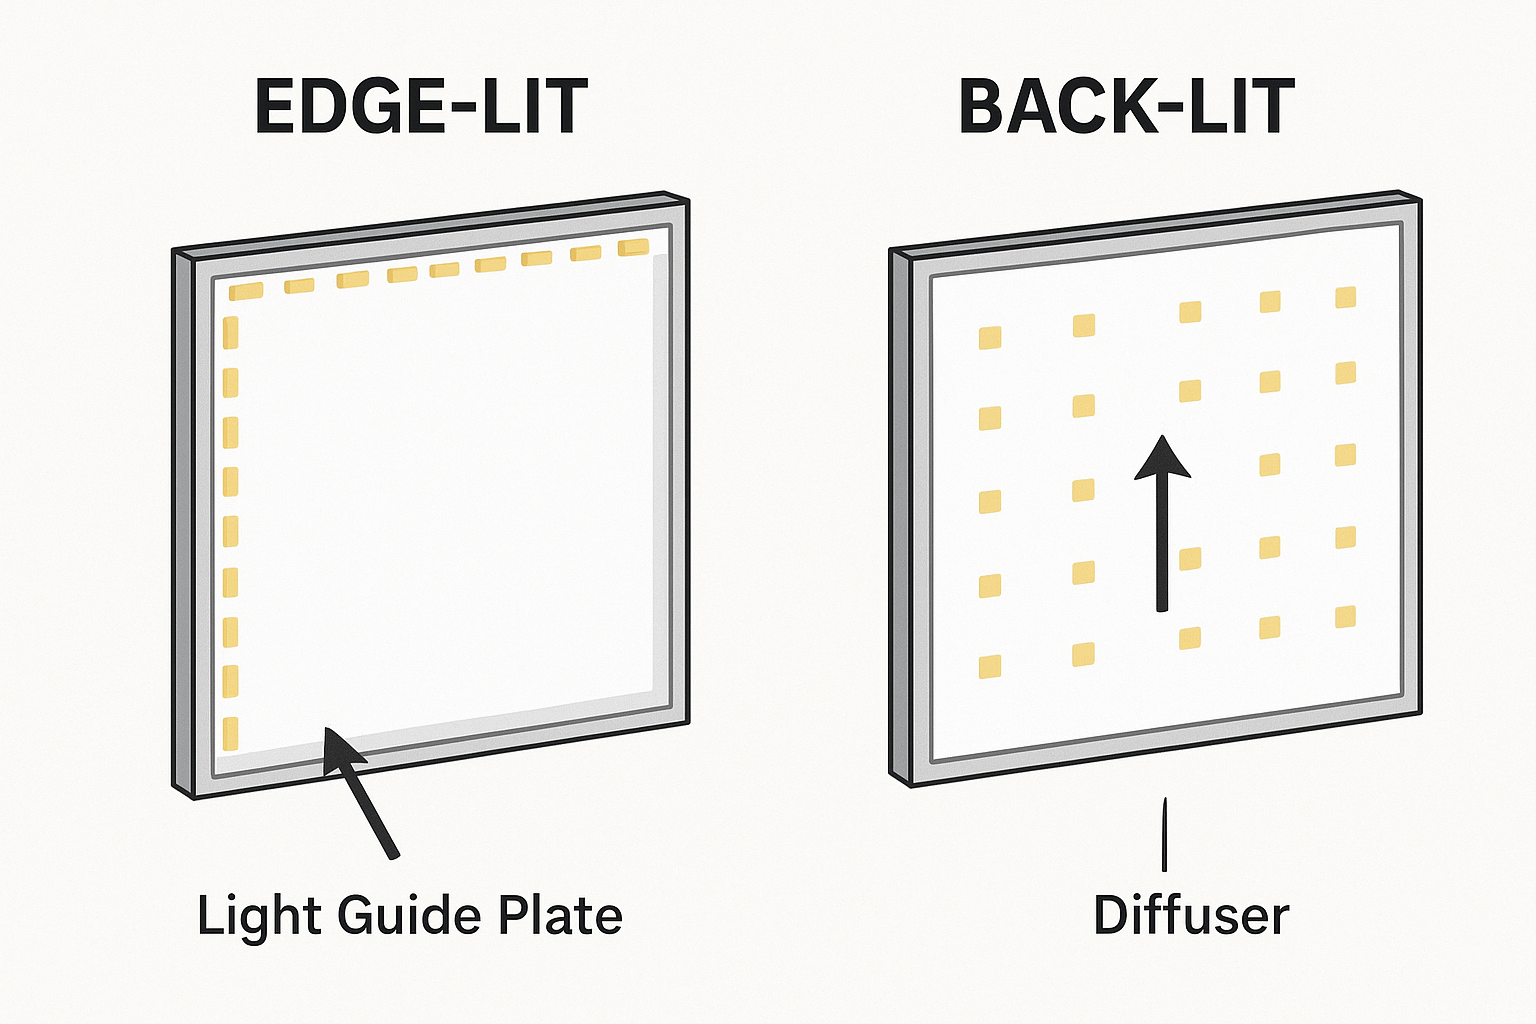
Edge‑lit panels place LEDs around the perimeter and use a light guide plate to spread light, enabling ultra‑slim profiles and smooth diffusion. Back‑lit panels position LEDs behind the diffuser, typically achieving higher efficacy and easier glare control with microprismatic optics. Neither is universally “better”; the right choice depends on your target efficacy, thickness, visual comfort (UGR), and cost envelope.
Most commercial ceilings accept recessed troffer‑style panels, but surface‑mounted frames and suspension kits cover concrete decks, exposed structures, and aesthetic needs. Confirm ceiling type, cavity depth, and driver placement (integrated vs remote) and verify the accessory kits match your ceiling module. For a quick scan of common mounting kits and formats, see the panel category hub on the brand site under the descriptive anchor text panel light lineup and mounting options.
Opal diffusers offer soft, uniform light, while microprismatic optics and honeycomb anti‑glare accessories can lower luminance at high viewing angles to help meet Unified Glare Rating (UGR) targets. If a project requires UGR ≤ 19 (typical for offices and classrooms), opt for controlled‑luminance optics and confirm with application‑based UGR calculations, not just a generic “UGR≤19” badge.
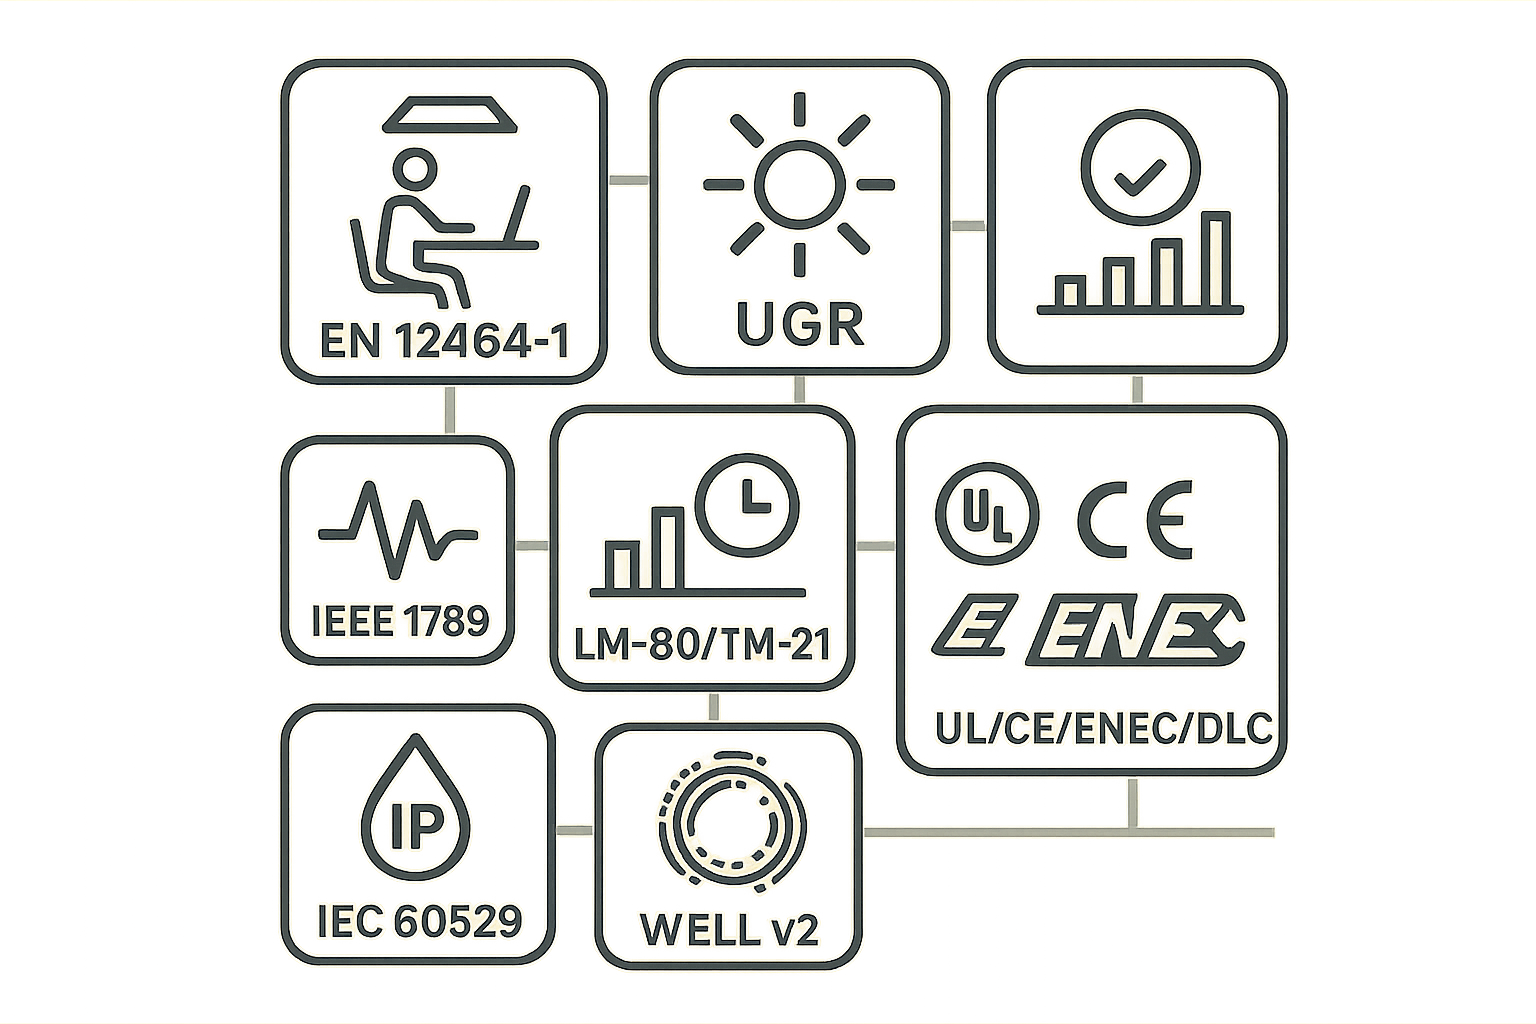
Workplace targets: For indoor work areas, summaries of the European standard specify typical maintained illuminance and visual comfort targets—e.g., around 500 lux for office workstations, CRI ≥ 80, and UGR ≤ 19—see the authoritative overview of EN 12464‑1:2021 from Performance in Lighting: EN 12464‑1:2021 indoor workplaces overview.
Glare method: The CIE Unified Glare Rating offers a consistent way to predict discomfort glare; the DesignLights Consortium fact sheet is a clear primer: DLC explainer on UGR and applications.
Flicker: To control temporal light modulation, many teams reference the recommended practice in IEEE 1789‑2015; details on acceptable flicker versus frequency are here: IEEE 1789 recommended practice summary.
Lifetime: Verify LED package/module testing via LM‑80 and the TM‑21 projection that supports lumen maintenance claims; a concise, technical explainer is available at the U.S. DOE archive: DOE overview of LM‑80 testing.
Ingress protection: IP ratings defined by IEC 60529 determine suitability for dusty or wet areas; Intertek describes the scheme clearly: IEC 60529 IP rating guide.
Well‑being and quality: The WELL Building Standard v2 includes features on glare control, light quality, and illuminance adequacy; see this practical summary: Summary of WELL Building Standard v2 lighting.
Safety and programs: UL (North America), CE/ENEC (EU) indicate safety conformity; ENEC also includes factory surveillance. DLC SSL qualification in North America can support energy program eligibility; verify the current version when rebates matter. A draft of the next SSL requirements is available here: DLC SSL V6 draft technical requirements (April 2025) (confirm the finalized version before making claims).
Lumens and efficacy (lm/W): Set targets by application; efficient panels commonly exceed 120 lm/W, with higher values for industrial‑grade needs.
CRI and R9: CRI ≥ 80 suits most spaces; CRI ≥ 90 with strong R9 helps retail and healthcare color tasks.
CCT: 2700–3500 K for hospitality/residential; 4000–5000 K for office/education/healthcare/industrial.
UGR and optics: Choose optics that control high‑angle luminance and validate UGR in situ.
Flicker metrics: Look for measured flicker percent and frequency consistent with IEEE 1789 low‑risk guidance.
IP rating: Match the environment (IP20/40 for dry interiors; IP44 for humid rooms; IP65+ for dusty/wet zones).
Electrical quality: Power factor (≥0.9 typical) and total harmonic distortion (THD) limits may be specified by projects.
4. How to Choose: A Practical Selection Workflow
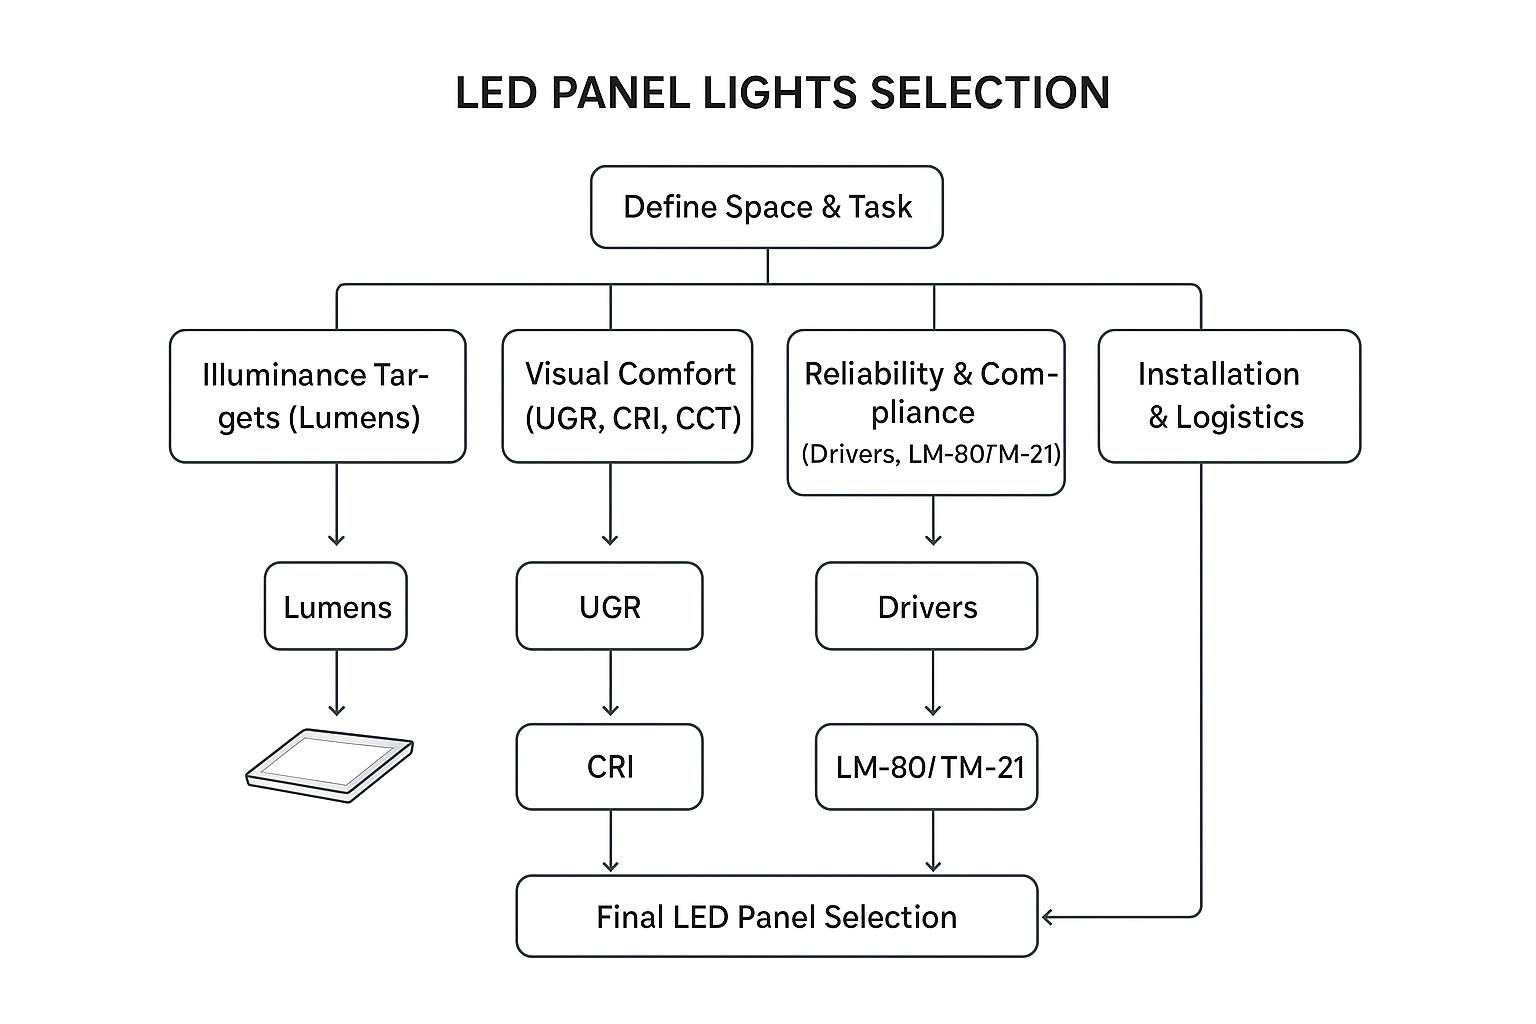
Start with the space type and task. As a rough planning method, total room lumens ≈ target lux × area ÷ (CU × LLF), where CU is coefficient of utilization and LLF is light loss factor. Example: a 90 m² office at 500 lux with CU 0.6 and LLF 0.8 suggests ≈ 500 × 90 ÷ (0.6 × 0.8) ≈ 93,750 lumens total. If your chosen LED panel lights deliver 4,000 lumens each, you’d preliminarily plan for around 23–24 panels, then refine with photometric tools and layout constraints.
For offices and classrooms, aim for UGR ≤ 19 and CRI ≥ 80–90 with CCT around 4000–5000 K. Use microprismatic or honeycomb optics to limit high‑angle luminance and improve visual comfort in reflective rooms. Retail often mixes warmer CCTs (3000–4000 K) with CRI ≥ 90 to make merchandise pop while maintaining acceptable UGR (often ≤ 22 in sales floors).
Favor constant‑current drivers designed to minimize visible flicker across the dimming range. Confirm that LED packages have LM‑80 tests and that the luminaire’s lumen maintenance claim is backed by a TM‑21 projection with appropriate test duration. Keep safety marks (UL/CE/ENEC) on file and check DLC listing if rebates are important.
Disclosure: KEOU Lighting is our product. As an example of how a distributor might navigate a lineup, a buyer could shortlist back‑lit microprismatic SKUs for offices and classrooms, then compare datasheets for flicker metrics, LM‑80/TM‑21 references, and safety marks. Keep this evaluation consistent across any vendor.
Confirm ceiling type (lay‑in grid vs plaster/concrete), available cavity depth, accessory kits, wiring method, and control protocol (0–10 V, DALI, phase). For practical prep and safety, see the internal installation walkthrough: tools and steps to install LED panel lights and the companion note on wiring and driver compatibility considerations.
Design toward 500 lux maintained on work planes with UGR ≤ 19, CRI ≥ 80–90, and CCT 4000–5000 K. Keep flicker low per IEEE 1789 guidance to reduce visual fatigue during screen work. Panels with microprisms help control glare in bright, reflective interiors.

Target 300–500 lux depending on age and tasks, with UGR ≤ 19 and CRI ≥ 80–90. Include dimming for AV modes. In multi‑purpose rooms, select drivers that maintain stable output when dimmed to prevent stroboscopic effects.
General areas and clinics often run 300–500 lux with UGR ≤ 19. Use CRI ≥ 90 where accurate color rendering matters (e.g., assessment areas). Aim for strong flicker control and, where cleanability is a priority, consider IP40–IP54 enclosures and sealed diffusers.
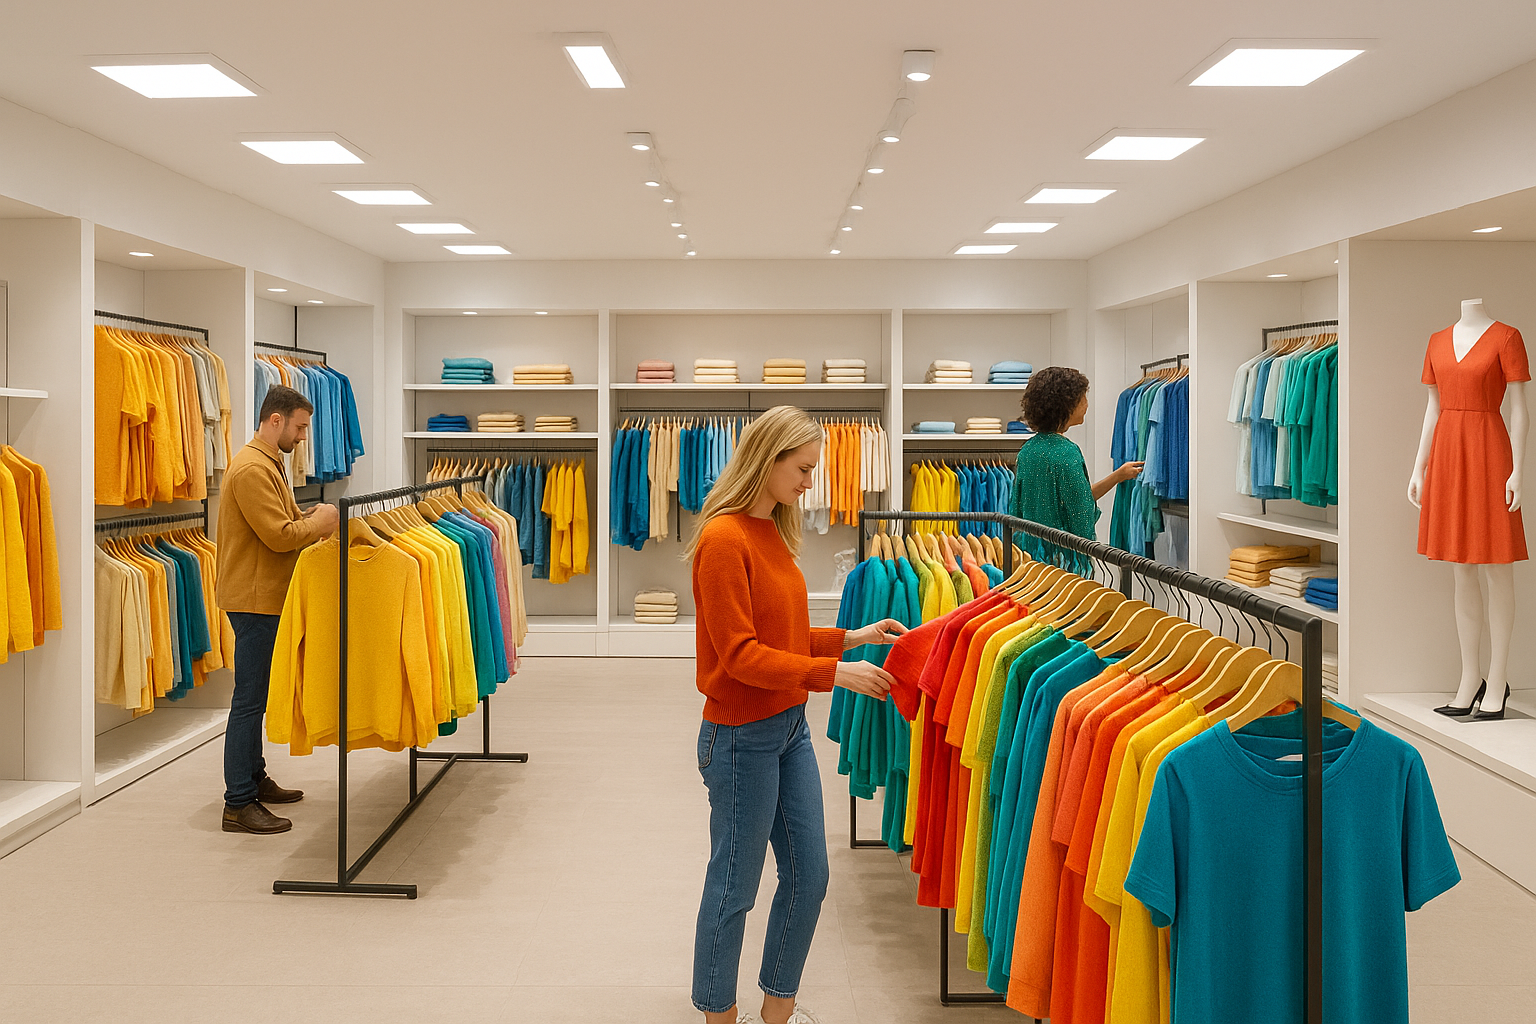
Plan higher illuminance (often 750–1000 lux combined with accent layers). Use CRI ≥ 90 with strong R9 for saturated reds and select CCT 3000–4000 K to align with brand mood. UGR thresholds are commonly ≤ 22 on sales floors; coordinate accent lighting with panels to avoid harsh contrasts.
Lobbies and public areas favor warm CCTs (2700–3500 K) with CRI ≥ 80–90 and modest illuminance, often around 300–500 lux in active zones. Smooth dimming and good driver behavior at low levels keep ambience comfortable. In guest rooms, lower illuminance and layered lighting are typical.
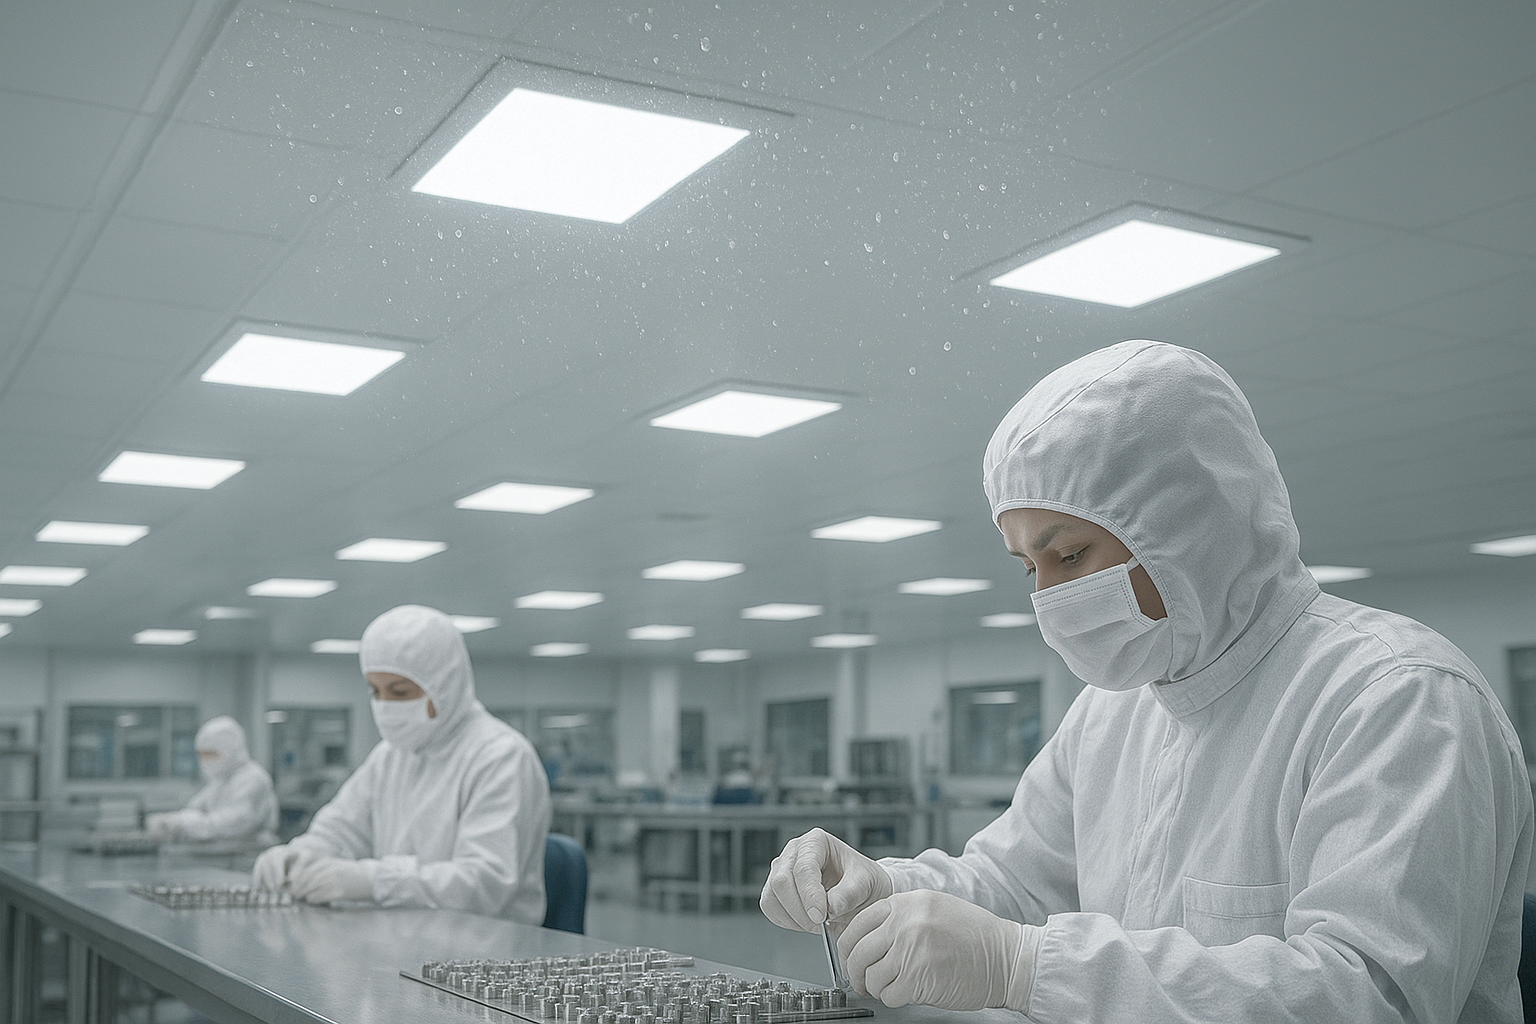
Select higher‑efficacy LED panel lights for light manufacturing or clean zones where a flat, uniform ceiling plane is desired. Typical ranges are 300–750 lux (more for detailed assembly), UGR ≤ 22–25, CRI ≥ 80, CCT 4000–5000 K. For dusty or humid areas, go IP65+ and ensure robust thermal paths.
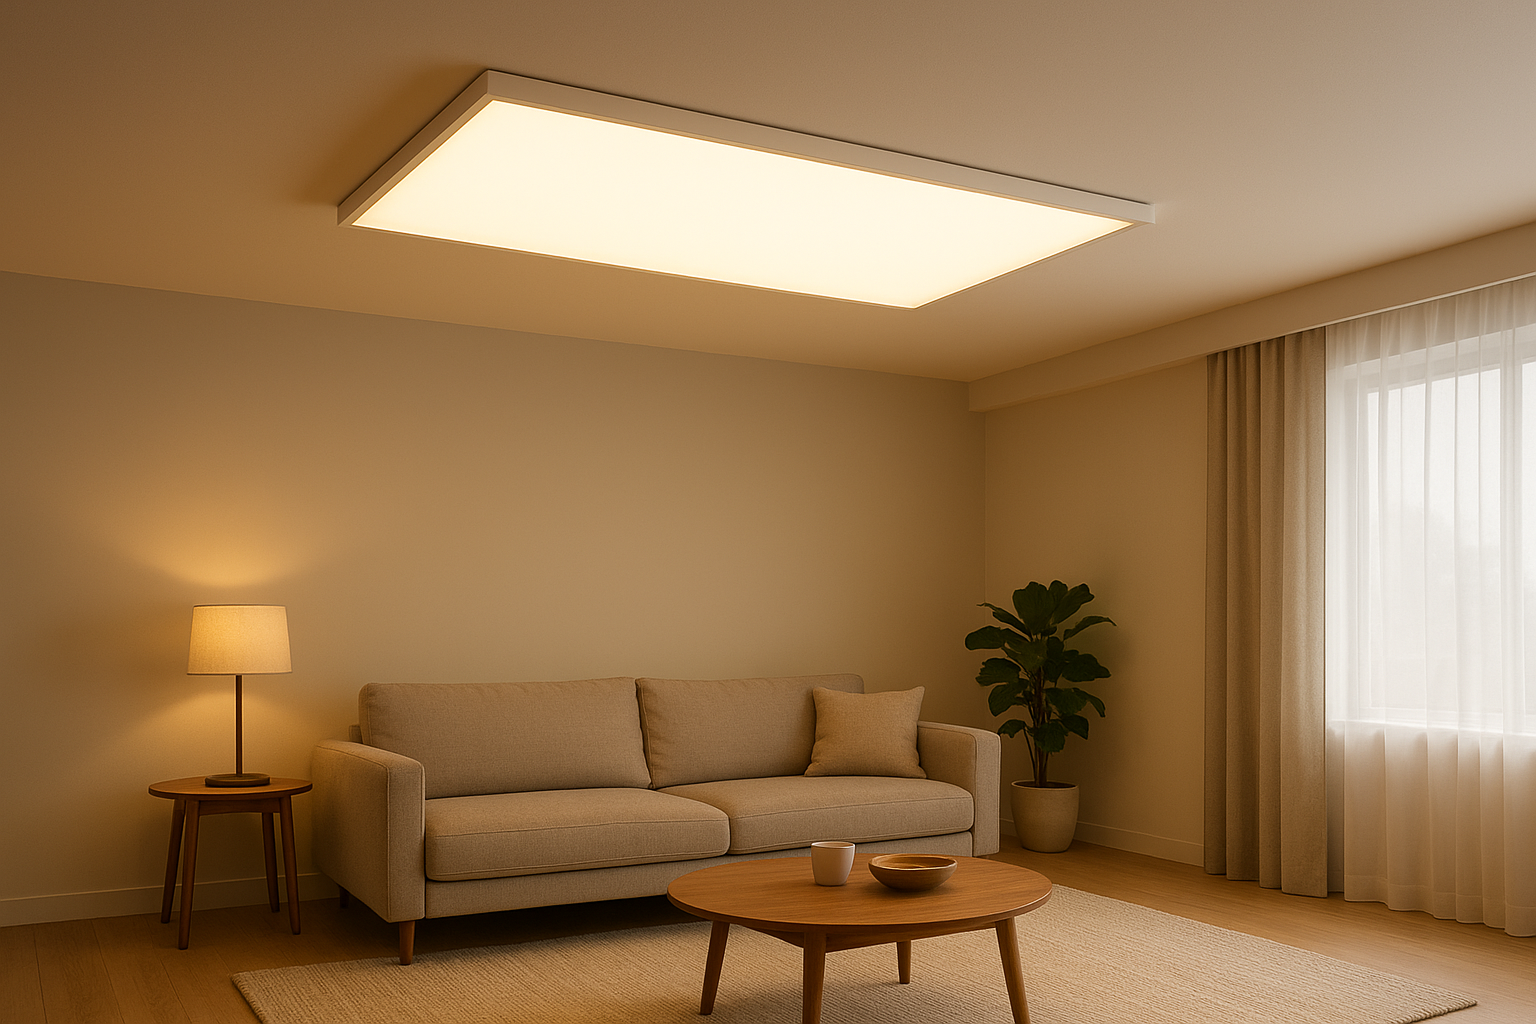
Living spaces generally sit around 100–300 lux with CRI ≥ 80 and warmish CCT 2700–4000 K. Bathrooms and kitchens may require IP44 in zones exposed to moisture, while bedrooms and living rooms can use IP20.
Use this compact checklist to evaluate any panel line consistently:
Verification packet: safety marks (UL/CE/ENEC), DLC listing if needed, LM‑80 package report and TM‑21 projection.
Flicker control: measured flicker percent/frequency aligned with IEEE 1789 low‑risk guidance; stable at dimmed levels.
Optical comfort: microprismatic or comparable optics where UGR ≤ 19/22 is targeted; application‑based UGR calculations.
Photometrics and efficacy: IES files, uniformity, and lm/W suited to the project class (≥120–140 lm/W for efficient specs).
Environment fit: IP20/40 for dry interiors; IP44 for humid areas; IP65+ for dusty/wet.
Controls and wiring: 0–10 V, DALI, or phase dimming confirmed; driver compatibility noted; spares available.
Commercials: warranty terms, documented failure rate history, batch testing, MOQ, lead time, packaging.
7. Neutral Datasheet Example and Compliance Table
Think of this like reading a nutrition label. A typical back‑lit panel datasheet might list 4,000 lm at 32 W (125 lm/W), CRI 90, CCT 4000 K, UGR “≤ 19 with microprism optic,” PF ≥ 0.9, THD ≤ 15%, driver flicker percent < 1% at full output, IP40, and UL/CE/ENEC safety marks. You’d then cross‑check LM‑80 for the LED package and a TM‑21 projection supporting the L70 claim, plus any DLC listing if you need rebates.
| Compliance item | What it means | What to ask for |
Safety mark (UL/CE/ENEC) | Conformance to regional safety standards | Certificate numbers and scope; factory surveillance (ENEC) |
LM‑80 (LED package) | Documented lumen maintenance testing | LED make/model, test temps, duration (≥6,000 h) |
TM‑21 projection | Lumen maintenance projection from LM‑80 data | L70/L90 projection within limits; sample sizes |
Flicker metrics (IEEE 1789) | Temporal modulation risk across dimming | Flicker percent/index and frequency test method |
UGR evidence | Discomfort glare control in the application | Optic type and application UGR calculations |
IP rating (IEC 60529) | Dust/water resistance for the environment | IP code, seals, cleanability notes |
DLC (where relevant) | Performance/controls qualification for rebates | Current version listing and model IDs |
Office refresh, 2×2 ft grid: A 600 m² open office targeted 500 lux. Replacing aging troffers with controlled‑luminance LED panel lights at ~125 lm/W achieved design illuminance with 30% fewer fixtures after layout optimization. Flicker measurements stayed below low‑risk curves, reducing complaints of eye strain. UGR ≤ 19 was met with microprismatic optics and desk‑level modeling.
Retail fit‑out, mixed CCT: A boutique used 4000 K panels for ambient light and 3000 K accents for product drama. CRI 90 with strong R9 delivered natural skin tones and vivid textiles. The sales floor met ~800–900 lux with balanced contrast, and glare stayed within a ≤ 22 design target.
Solid basics prevent 90% of site issues. Confirm ceiling module and accessory kits before delivery, and pre‑test a sample kit with the actual dimming system. If you need stronger housings or heat paths, review aluminum‑frame options like the brand’s aluminum shell ceiling panel light construction example to understand how frames and heat sinking affect stability over time. For step‑by‑step prep, the brand’s guide on tools and steps to install LED panel lights covers fundamentals.
Common symptoms and quick checks:
Visible flicker at low dim levels: verify driver type and control protocol; test different dimming curves.
Glare complaints: switch to microprismatic optics and revisit layout; check ceiling reflectance.
Uneven brightness: confirm driver output and connections; review diffuser integrity and panel orientation for edge‑lit designs.
Edge‑lit panels are ultra‑thin and use a light guide plate for uniformity; back‑lit panels place LEDs behind the diffuser, often with higher efficacy and easier glare control. Choose based on thickness limits, efficacy targets, and UGR needs.
No. Offices and classrooms commonly target UGR ≤ 19, but retail and circulation can be comfortable at ≤ 22. Use the CIE UGR method and room geometry to validate rather than relying on a generic label.
Look for measured flicker percent and frequency data across dimming levels and compare to the guidance in IEEE 1789. Driver design and dimming protocol both matter.
Safety marks (UL in North America; CE/ENEC in Europe) are table stakes. For rebates in North America, check the current DLC SSL listing. Also verify LM‑80/TM‑21 documentation for lifetime claims.
Typically IP44 for zones prone to splashes and steam. Dry interiors can use IP20/40. For dusty or wet industrial areas, consider IP65 or higher.
Yes. For living rooms and bedrooms, aim for 2700–3500 K with CRI ≥ 80 and comfortable output around 100–300 lux. In bathrooms, step up to IP44 where exposure to moisture is likely.


